

7 Best Functional Exercises for Losing Weight.
Exercise is freakin’ awesome… it’s literally medicine!
Whether you’re targeting weight loss, trying to rid yourself of chronic pain, or just want to move better, exercise is a MUST. There’s no arguing with that.
In one way or another, just about any form of exercise can simultaneously help your waistline, your body, AND your mind. From straight up walking to functional fitness training, the research is there to support it.
One form of exercise that has gotten a ton of hype lately and is clearly beneficial is functional training.
That’s because functional training is any form of exercise that can help you in your activities of daily living (ie. taking your groceries in, vacuuming the living room, cleaning up after your kids/dog… the list goes on!)
And let’s keep in mind, functional exercise can come in many forms: circuit training, HIIT training, endurance training... and what this article will focus on: Resistance Training.
And you know what’s freaking cool?
Resistance training, or strength training as it’s often referred to as, can also help you lose weight! Basically, more lean muscle tissue means greater metabolic demand. Which roughly translates to: it takes more calories to repair, maintain, and build muscle. #science
BOOM. WIN-WIN!
Below I specifically highlight the mode of resistance training to help you lose weight effectively through the use of select functional exercises.
Oh and I include 2 FREE weight loss workouts at the bottom!!
Weight loss isn’t the only benefit that resistance training offers,(1) the research shows that resistance training can improve type 2 diabetes,(2) reduce obesity,(3) enhance cardiovascular health,(4) preserve bone mineral density for those at risk of bone loss,(5) can counter the adverse effects of chronic diseases,(6,7) and can increase muscle mass in adults.(7,8)
1. Squat
How it Applies to Everyday Life: The squat helps you a TON in your everyday life. Every time you bend down to pick up a grocery bag, sitting down to go to the bathroom, or lift a cooler full of frosty beverages for your next party… the squat has your back, literally. It’ll protect your back. Stronger glutes and legs… less back pain.
The Movement: Keeping your feet flat on the ground, hip width apart, push your butt back gently while simultaneously bending your knees. Next, while keeping your back flat, lower your body until your back starts to break. Allow your knees to track forward as well. They can go over the toes, but in order to do so safely, your heels must remain in contact with the floor.
Variations/Terminology: Squat, goblet squat, air squat, back squat, front squat, cossack squat, barbell squat, and dumbbell squat.
Expert Tips: When learning the proper squat, start with the goblet squat or any front squat variation. Both of those functional squat patterns will allow you to maintain a better positioned torso and utilize more glute and quad function throughout.
Tools to Help: 6mm Knee Sleeves- These will keep the knees warm and mobile throughout the movement. At 6mm in thickness, these sleeves are the perfect blend of a super thick 7mm powerlifting knee sleeve and a thinner, functional 5mm knee sleeve.
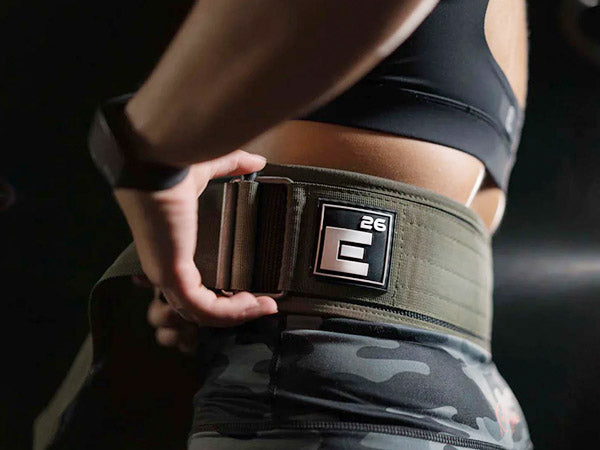
Self-Locking Weight Lifting Belt- Enhances intra-abdominal pressure to give you better core, pelvis, and low back stability. It’s super secure, easy to use, and doesn’t rely on velcro to maintain the stability. The buckle holds all the tension.

2. Push Up
How it Applies to Everyday Life: Having the strength and endurance to push yourself up from the ground or from an inclined position is CRUCIAL as we age. It may not matter much to the younger folks who can do push ups in their sleep, but for those who are getting up there, the push up becomes that much more important. You’ll be able to brace yourself if you fall, bust open a heavy door, and push your lawnmower up a steep incline. And for those younger folks, the push up promotes proper scapular-thoracic rhythm and strength aka keeping your shoulders healthier.
The Movement: Start on your hands and knees with your hands placed directly under your shoulders. Next, raise your knees so you're now on your hands and feet. Lower yourself in a smooth controlled fashion touching your chest to the floor. Then press back up and lock out the shoulders and elbows.
Variations/Terminology: Incline push up, decline push up, hand release push up, close grip push ups (inside shoulder width), and wide grip push ups (wider than shoulder width).
Expert Tips: If you’re unable to do a full range of motion push up on the ground, I suggest elevating your hands by using a bar in a rack or smith machine in order to build up the strength and work capacity required to perform the push up movement. If you do use a barbell in a rack, check out the suggested implement below to help steady the bar in place.
Tools to Help: BarBelts (patent pending)- These are an amazing tool to hold any barbell steady in a rack. Use it to perform elevated push ups on a barbell so the bar isn’t moving around. This is highly recommended if you can’t perform push ups on the ground. Great place to start!

3. Deadlift
How it Applies to Everyday Life: The deadlift is the magic elixir for literally everything... Half kidding… But seriously, building up strength on your backside (glutes, hamstring, back muscles) by using the deadlift is so vital for everyday function and resilience. Whether you’re shoveling the driveway in the Winter, doing yard work in the Spring, or just moving some furniture around mid-Summer, having the strength and endurance to be able to freely do these simple tasks is important for back health and definitely correlates with overall health and longevity.
The Movement: With a barbell in front of you or set of dumbbells at your sides, hinge your torso forward, only pivoting at your hips. The back should stay perfectly straight. Allow the knees to bend a little but less than in the squat. Next grab the barbell or dumbbells and stand up straight and give your glutes a nice squeeze at the top. Repeat the same movement again as you lower the weight back to the ground.
Variations/Terminology: Romanian deadlifts, stiff leg deadlifts, straight leg deadlifts, sumo deadlift, single leg deadlift, dumbbell deadlift, and trap bar deadlift.
Expert Tips: As you work on the deadlift, make sure to keep the bar as close to the body as you can. Allowing the bar or weights to drift in front of you puts extra stress on the back. Once form starts breaking down and the back starts rounding, that’s when you should take a break before resuming.
Tools to Help: Self-Locking Weight Lifting Belt- Enhances intra-abdominal pressure to give you better core, pelvis, and low back stability. This is especially true when the weights start getting heavier. Definitely a strong tool worth considering!
Figure-8 Padded Lifting Straps- These straps essentially lock your hands to the bar and give you a stronger “attachment” to the bar since grip can be a limiting factor once you start getting heavier. Highly recommended for Romanian Deadlifts or deadlifts that require the bar to remain in your hands for longer periods of time.

4. Overhead Press
How it Applies to Everyday Life: One thing I can say from my experience after working with hundreds of everyday individuals is that the ability to reach up overhead declines as we get older. And if that ability to reach up and overhead diminishes, we will compensate and get range of motion elsewhere, for example we’ll use the neck muscles and low back muscles to try and extend our bodies. That causes excessive strain and stress on those areas. And if you’ve had back pain, you know how that feels. And this doesn’t just apply to the older folks, this can be the younger guys and gals playing sports. If you lack overhead strength, you’re asking for overuse injuries in other areas.
The Movement: Let’s use the dumbbell overhead press as an example. Standing straight looking forward, grab a pair of “light-ish” dumbbells and bring them to the level of your shoulders. Next press the dumbbells up and overhead. Then return them slowly back to the level of your shoulder. That’s one repetition.
Variations/Terminology: Shoulder press, barbell overhead press, military press, push press, dumbbell shoulder press, and dumbbell press.
Expert Tips: If you suffer from shoulder pain when reaching/pressing overhead, you don’t need to necessarily be pressing overhead. Instead, work the push up position on an elevated bar using the BarBelts or try an incline press where you’re lying on a bench. Both of those positions make the movement more “shoulder friendly.”
Tools to Help: Self-Locking Weight Lifting Belt- This will help cue your torso to stay straighter as you press overhead. Also, this will help you generate more low back stability by increasing your intra-abdominal pressure.
IsoWrap Wrist Wraps- If pressing overhead is a bit painful on the wrists, these will help stabilize that joint. The best part is these wraps aren’t quite like the big, bulky outdated ones you see in all those big commercial gyms. These ones are one-inch in thickness and provide precise stability to those smaller wrist bones. Definitely a more functional option.

5. Pull Ups
How it Applies to Everyday Life: Pull ups work strength in a variety of areas. We’re talking grip strength, back strength, bicep strength, and even core strength indirectly. By working strength in all these areas, you’re improving range of motion, enhancing bone density, and helping to strengthen tendons and ligaments throughout the upper extremities and torso. Not to mention pull ups also aid in proper scapular movement and function- shoulder health WIN! And having a greater ability to hold something and pull your body weight is important when taking on any task that life throws at you.
The Movement: Start by hanging on a bar that’s overhead. For a pull up, your palms should be facing away from you (you can also have your palms facing you, but that is called a chin up and is a slightly different variation). Next, make sure your arms and shoulders are completely straight. Then, pull yourself up to the bar to the level of your collarbone, or if you’re feeling strong, to the level of your chest. Next lower yourself slowly and return to a full hang.
Variations/Terminology: Pull up, chin up, jumping pull ups, eccentric pull ups.
Expert Tips: Perform every repetition with the arms and shoulders straight. You’ll see a lot of athletes trying to cheat reps and won’t lock out their elbows or shoulders at the bottom of the pull up. By shortening the range of motion, they’re leaving a lot of potential on the table in terms of muscle growth and joint health. Joints and muscles LOVE full range of motion. If you’re unable to get a pull up, no worries! Start with jumping pull ups where you jump to the bar and lower yourself slowly OR use the BarBelts mentioned below and perform feet supported pull ups to steadily increase your upper body strength.
Tools to Help: BarBelts (patent pending)- These are a FANTASTIC tool to secure a barbell in a rack. You can use these to help get your first pull up if you’re unable to perform one with your bodyweight. The BarBelts allow you to scale your pull ups so you can build up upper body strength as you make your way to your first pull up.
IsoGrip Hand Grips- These hand grips literally stick to a steel bar. The benefit here is that they will reduce your grip/forearm fatigue and allow you to bang out more pull up reps. And a huge BENEFIT is they don’t require any chalk and prevent your hands from getting ripped up from the bar.
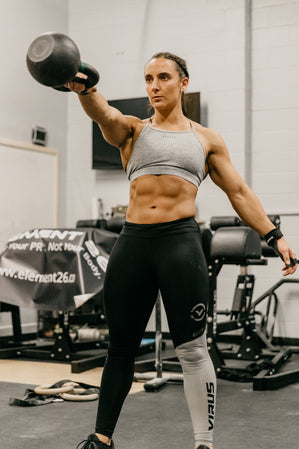
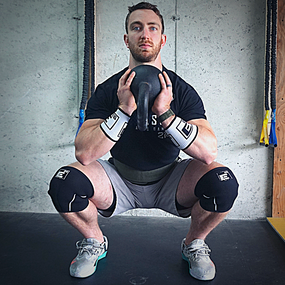
6. Kettlebell Swing
How it Applies to Everyday Life: Similar to the deadlift, the kettlebell swing is a great movement for enhancing that backside strength, increasing glute size, and making you an all-around savage in everyday life. What the kettlebell swing offers, in contrast to the deadlift, is more of a conditioning effect. Performing multiple repetitions will get you breathing heavy and get those glutes feeling the burn. The best part of enhancing that backside strength and endurance is that you’re going to move more efficiently throughout the day and with less fatigue.
The Movement: Grab a light-medium weight kettlebell with both hands. Stand up straight with your legs slightly wider than hip width. Next, bend forward while actively pulling the kettlebell between your legs. Once you feel a slight stretch/engagement of your hamstrings and glutes, squeeze your butt hard and straighten your hips and knees allowing the kettlebell to shoot up and forward in front of you. (Don’t pull with your arms, keep them loose). The kettlebell will reach chest height, and once it does, gravity will work and pull the kettlebell back down. All you have to do is guide it back between your legs and then redirect it back upwards. That’s it!
Variations/Terminology: Kettlebell swing one arm or two arm.
Expert Tips: Make sure you have the hip hinge pattern down first before performing this movement. That is the basic movement required to perform the kettlebell swing without aggravating your back. Also, allow the kettlebell to shoot up and forward using your hips, not your back. If you feel it in your back, cease the activity or lighten the weight.
Tools to Help: IsoGrip Hand Grips- The grips help maintain a strong hold of the kettlebell since they’re made of a rubber material. Rubber on steel is the perfect combination of grip and strength! They keep you glued to the kettlebell for the duration of the set.

7. Barbell Row
How it Applies to Everyday Life: The stronger your back is, the stronger your foundation is. And with a strong foundation, you’re going to be more resilient in your day-to-day activities. The barbell row, which targets the primary movers (lats, traps, rhomboids, and teres major), also hits the paraspinal/postural muscles since you are bent forward and required to maintain that torso angle throughout the movement. Increased strength and endurance in the postural muscles helps combat back pain while making movement at your pelvis and hips that much easier.
The Movement: Standing straight and holding a barbell in your hands, bend forward while keeping a flat spine. Similar to the deadlift, push your hips back and have a gentle bend in the knees. Your torso angle will approach a 90-degree bend but the total amount of flexibility will be limited by your hamstrings. If you can bend forward to 90-degrees, perfect, but certainly not required to effectively row the bar. Next, pull the bar up and towards your abdomen. Yes, the abdomen. That will keep the bar close and allow your lats to do most of the rowing.
Variations/Terminology: Barbell row, dumbbell row, inverted row, seated row, and cable row.
Expert Tips: If you’re just starting out on barbell rows, start light. These will really work your postural back muscles as they have to hold you in place throughout the movement. Seriously, just use the bar to start or some light dumbbells, no need to jack up the weight too early. Build the endurance and strength slowly.
Tools to Help: IsoGrip Hand Grips- These grips will stick perfectly to your barbell and don’t require any chalk! So once you’re performing sets with higher reps, these grips with help keep your grip to the bar.
Figure-8 Padded Lifting Straps- These straps are so much easier to use than regular straps and really lock you to the bar. These will spare your grip strength putting all the work and load on the back muscles where it should be.
Self-Locking Weight Lifting Belt- Going heavy on rows is a great way to increase back strength and size. A belt in this case would be used to create greater intra-abdominal pressure to support your low back while telling your brain it’s ok to lift a bit more.
Take a breather!!
Take a minute now and soak that in.
Definitely bookmark this blog and share it with your family/friends who may be interested in functional training to get stronger and lose some weight at the same time.
Keep in mind losing weight is multifactorial and doing just these exercises isn’t the only thing required. Things like nutrition, recovery, and stress management are incredibly important in this journey as well.
Ok so as I promised, below are your 2 FREE weight loss circuits involving the functional exercises I have just laid out above.
The combination of these exercises will get you breathing heavy and can absolutely kick your butt depending on the weights that you choose. So be smart!
Ask a local trainer, coach, or physical therapist if you need help adjusting the functional activity.
Below are your 2 FREE Workouts!!
Circuit 1: EMOM (every minute on the minute) x 16 minutes
15 Goblet Squats
10 Push Ups
15 Kettlebell Swings
10 Pull Ups
Instructions: Grab a stopwatch you can visualize for 16 minutes. Set it to start at zero.
Starting at 0:00-1:00 (perform the 15 goblet squats, make sure you finish within 45 seconds otherwise the weight is too heavy or you’re moving too slow).
At 1:00-2:00 (perform the 10 push ups, again finishing within 45 seconds to give yourself some brief rest before starting minute 2).
And so on until you get to 16 minutes. Pace yourself! Smooth is fast.
Advice: Choose a medium weight kettlebell that you can use for the goblet squats and for the kettlebell swings.
Gear recommended: IsoGrip Hand Grips- to spare your hands and grip on the goblet squats, kettlebell swings. and pull ups.
BarBelts- to help you scale your push ups if you can’t do them on the floor yet. Use the BarBelts to perform the push ups elevated on a rack.
Circuit 2: 5 Rounds
Perform the following exercises and descending reps that follow:
Deadlift 15, 12, 9, 6, 3
Overhead Press 15, 12, 9, 6, 3
Dumbbell Row 15, 12, 9, 6, 3
Rest 30 seconds
(After each round rest 30 seconds before continuing).
Instructions: Start with the deadlift and perform 15 reps. Immediately upon completion go into your overhead press for 15 reps. Immediately after that, perform the dumbbell row. Rest 30 seconds after that. Then repeat each exercise for 12 repetitions… and so on.
Advice: This circuit will get heavy on the back! Keep that in mind. Go much lighter than you think on the deadlifts.
I have intentionally swapped out the barbell row for the dumbbell row to limit total back fatigue. Please perform the dumbbell row with some upper body support from the opposite arm like in the picture.
If you choose to use a barbell for the overhead press, don’t use the same barbell as the deadlift, grab two separate barbells. You should not be overhead pressing your deadlift weight.
If you do not have the ability to grab two barbells, choose either a different deadlift variation like a kettlebell deadlift, or use dumbbells to perform your overhead press.
Gear recommended: Self-Locking Weight Lifting Belt- This is the perfect piece of equipment for this workout. Although the weights won’t be to your max, your back is going to be accumulating fatigue. The belt will be essential once you get deeper into the workout. And because it tightens and loosens easily, you can wear the belt throughout and just tighten it when you need it.
Figure-8 Padded Lifting Straps: These straps will help limit your grip fatigue for the deadlift and barbell row. There’s a lot of grabbing in this workout, so make sure you’re prepared ahead of time!
Bottom Line
There are many functional exercises out there that can help you lose weight. The selection that has been presented above are the ones that will give you the most bang for your buck. Prescribed correctly, these movements can help rid you of pain, help you move better, increase muscle mass (considering there is progressive overload), combat some metabolic issues, and reduce fat mass.
Good luck on your functional fitness journey!
Disclaimer: The information in this article is for educational purposes only and is not a substitute for professional medical advice. I have not thoroughly evaluated you, nor do I have any awareness of your medical history. If you decide to perform these exercises or the workouts included above, please consult your medical professional or healthcare provider to ensure you can safely and effectively perform them.

Written by: Phil Gauthier
Phil is a Doctor of Physical Therapy and Certified Strength and Conditioning Specialist.
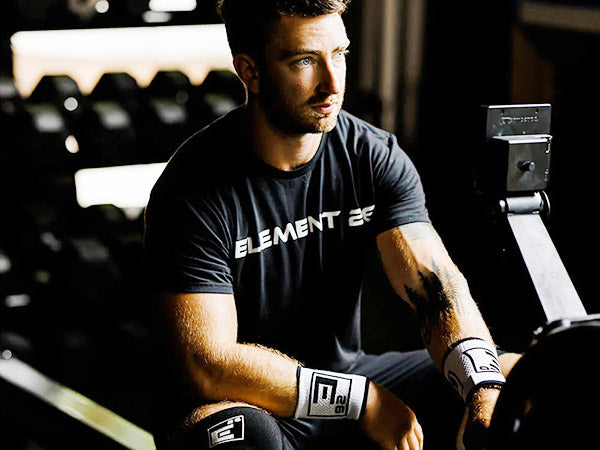
He is also an Owner and Co-Founder of the performance gear company, Element 26 (E26).
E26 prides itself on developing functional gear for the functional athlete to help you "Destroy Your PR's, Not Your Body."
To reach Phil or any member of the Element 26 Staff, please email us at: support@element26.co and we will respond to you ASAP!